
Corne Keyboard — Custom Mechanical Keyboard
Full build of a 42-key split keyboard: soldering, assembly, and QMK firmware programming in C
Tech Stack
Why build your own keyboard
We spend thousands of hours a year with our hands on a keyboard, yet we never really question this tool. Standard keyboards are a direct legacy from 1870s typewriters. Same layout, same constraints, zero ergonomic evolution. After wrist pain and a growing curiosity for the mechanical DIY movement, I decided to build mine from scratch. Not buy a gaming RGB keyboard, actually build it: solder every component, program every key, understand every layer of the system.
Why the Corne Keyboard
The Corne (CRKBD) is a 42-key split ergonomic keyboard, based on the Aurora Corne PCB from splitkb.com.
What sold me right away was the ortholinear layout. On a standard keyboard, rows are staggered from each other, yet another leftover from typewriters where it was necessary to prevent mechanical arms from overlapping. On the Corne, columns are straight. To reach the upper row, you just move your finger up. It’s logical, it’s natural, and you start wondering why all keyboards aren’t built this way.
Then the ergonomics go further than just column alignment. Each column is offset in height to match the natural length of your fingers: the index column sits lower than the middle finger, which is higher than the ring finger. Your hands rest on it effortlessly, no wrist twisting required. And since the keyboard is split, you can space the two halves at shoulder width instead of compressing everything toward the center.
The keyboard is also 100% programmable thanks to the QMK firmware. Every key does exactly what you want, with as many layers as you need. And if a switch starts wearing out or you want a different typing feel, you just pull it out and clip a new one in thanks to the hotswap mount. No desoldering, no hassle.
The components
Building a custom keyboard means sourcing parts one by one. No all-in-one kit here:
| Component | Details |
|---|---|
| PCB | Aurora Corne v2 (splitkb.com) |
| Microcontroller | Pro Micro RP2040 (× 2) |
| Diodes | SMD 1N4148W (× 42) |
| Hotswap sockets | Kailh (× 42) |
| Switches | Your choice, hotswap mount |
| Keycaps | Cherry profile, PBT |
| TRRS cable | Connection between halves |
| USB-C cable | Connection to PC |
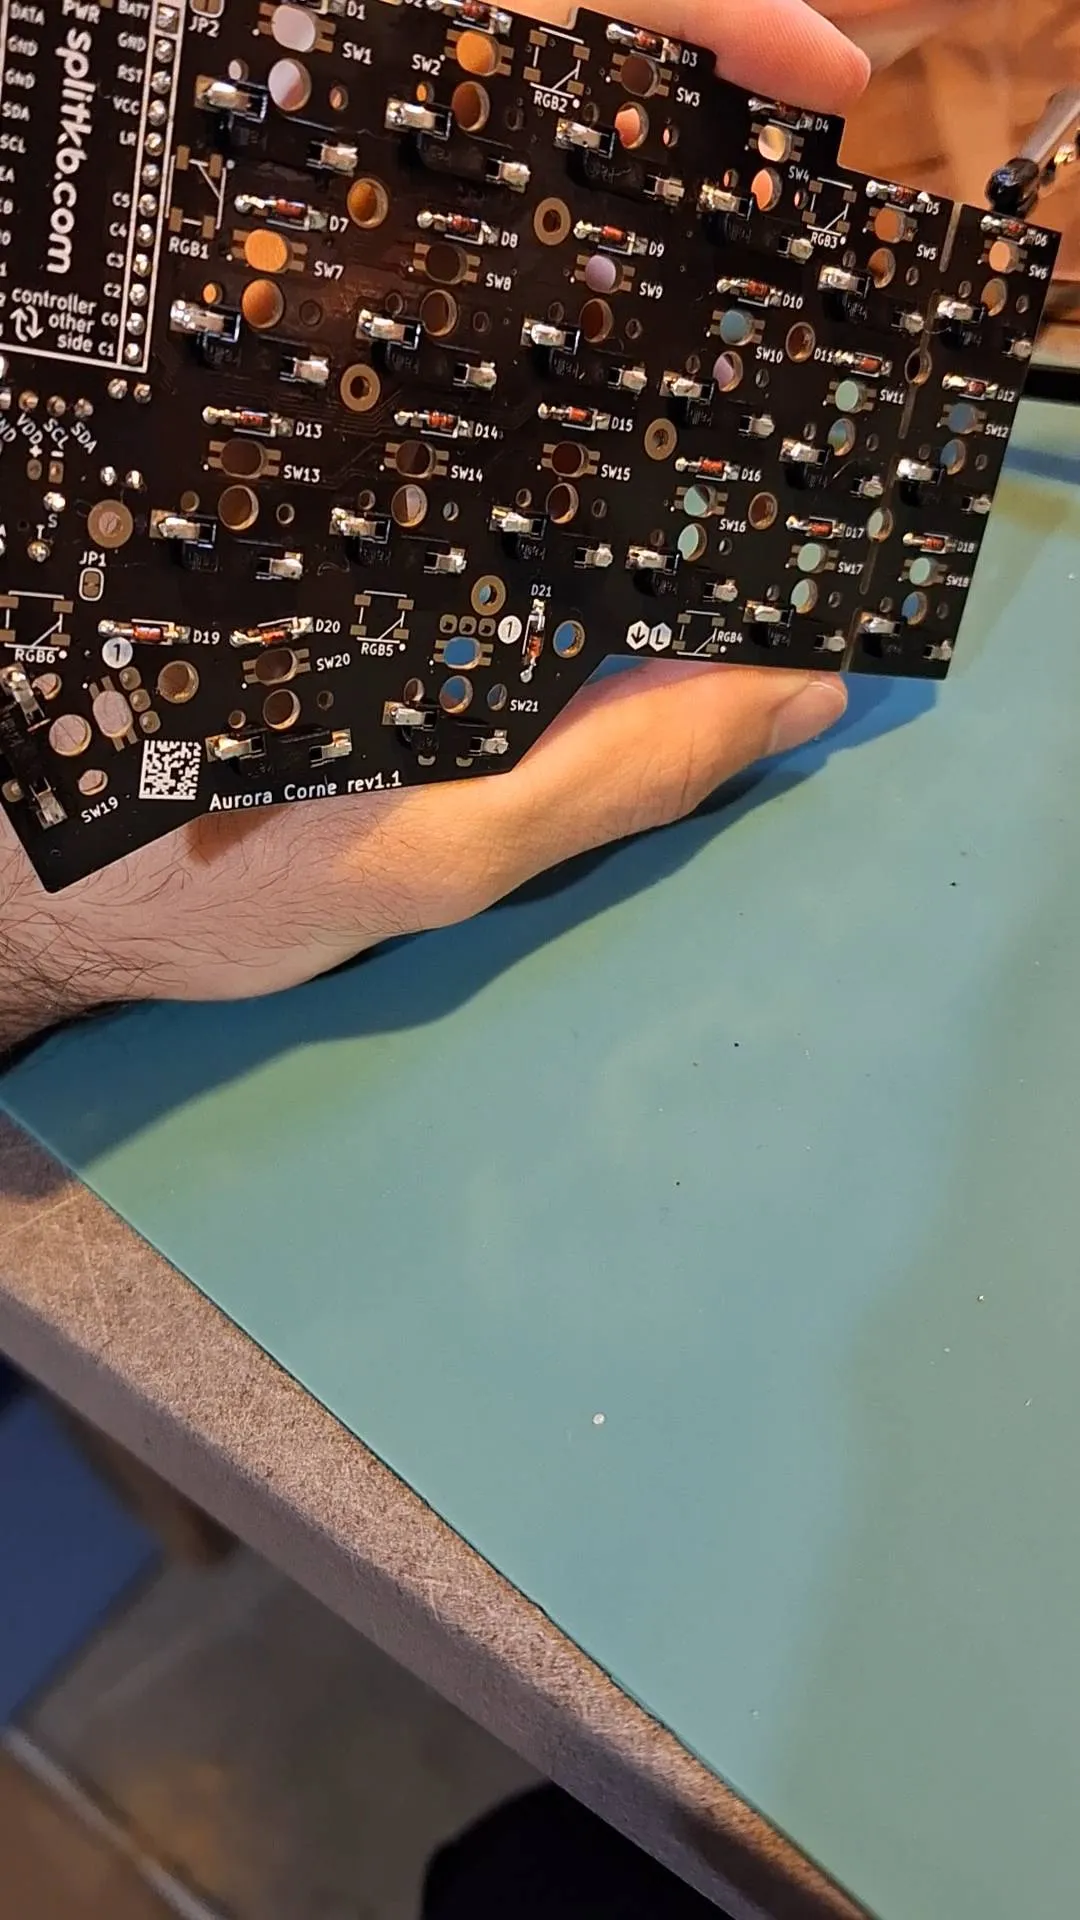
Soldering
This is the part that’s most intimidating at first, and most satisfying once it’s done. SMD diodes are tiny, barely 2 mm, and each one must be oriented correctly or the key stays dead.
For each half of the keyboard, you solder 21 SMD diodes with a fine-tip iron and flux (a magnifying lens is essential), then the hotswap sockets while pressing them flat against the PCB during heating, and finally the Pro Micro RP2040 microcontroller via its headers.
Flux is really the thing you underestimate when starting out. Without it, solder balls up and refuses to flow properly. The other lesson I learned pretty quickly: test every joint with a multimeter before moving on. Debugging a fully assembled keyboard is far more painful than checking as you go.
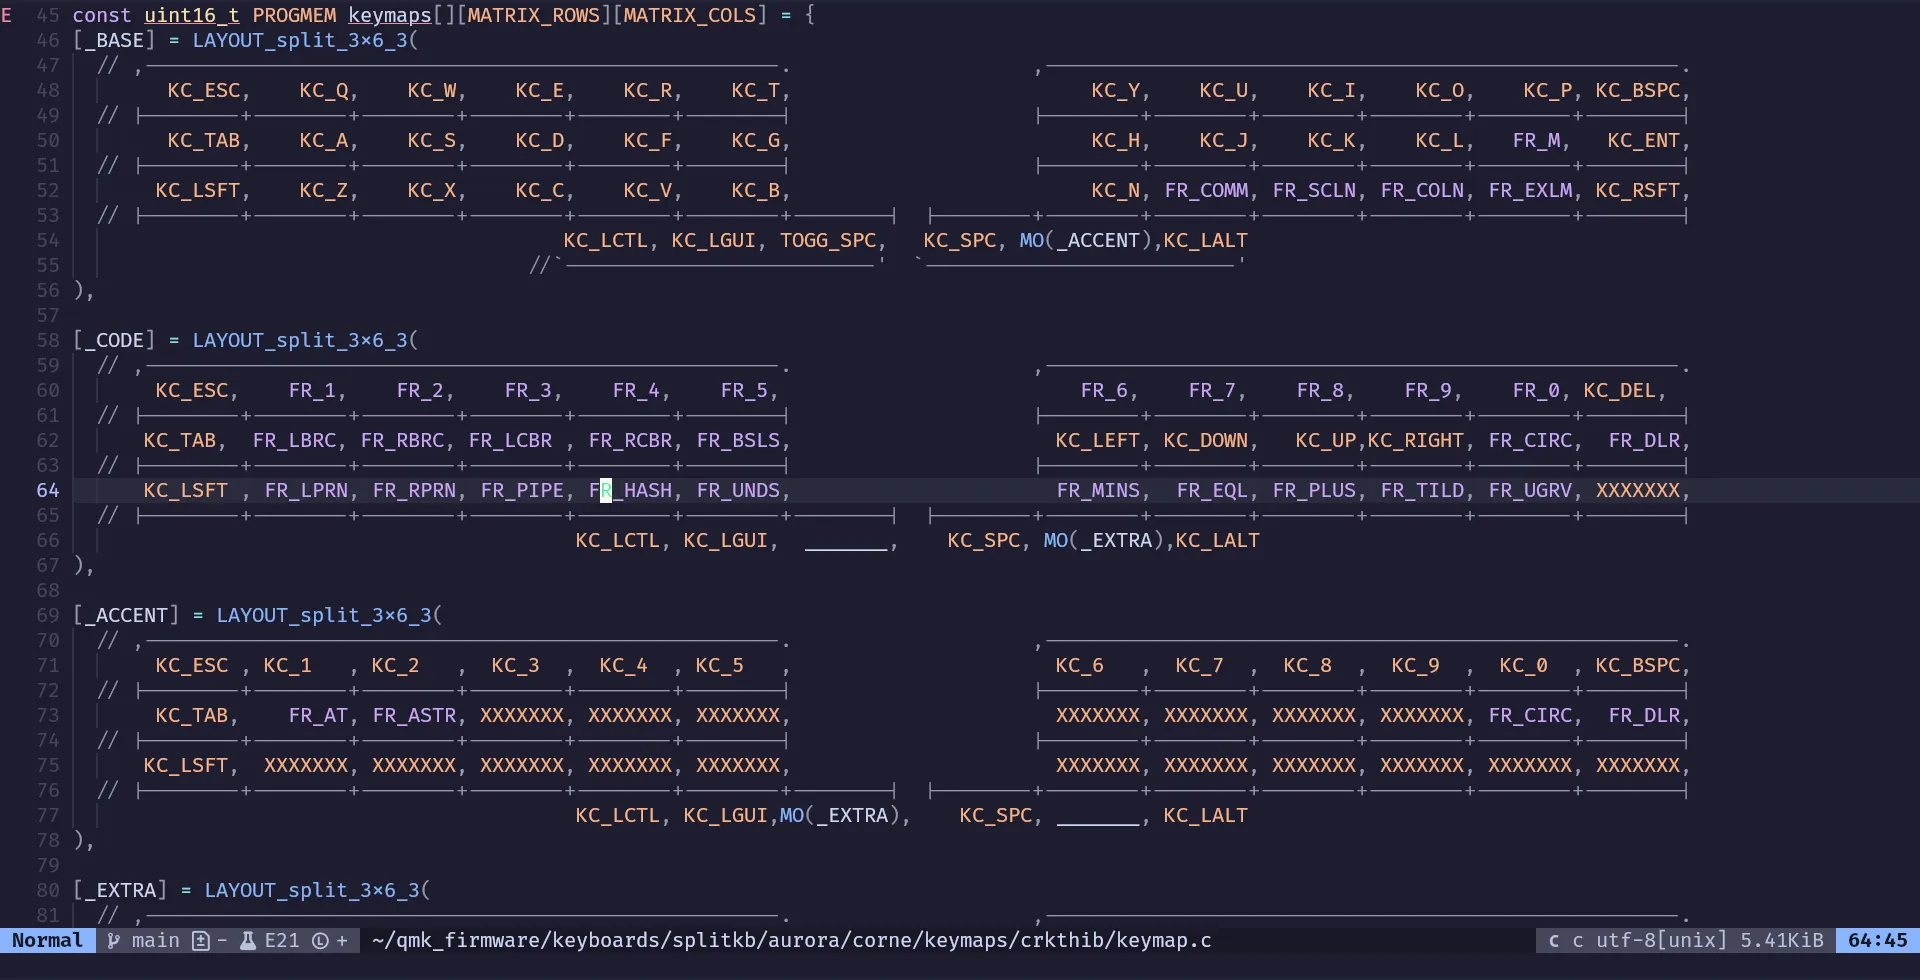
QMK firmware programming in C
QMK is the standard open-source firmware for custom keyboards. You write your configuration in C, compile to a UF2 file, and flash it onto the RP2040 via simple drag-and-drop (the microcontroller shows up as a USB drive in bootloader mode).
How do you type with only 42 keys?
That’s the question everyone asks. The answer: layers, exactly like on a phone. When you type “é” on a smartphone, you hold “e”. Same principle here, but with dedicated keys to switch layers.
Layer 0 is letters, the standard layout (QWERTY in my case). This is the default layer, used 90% of the time.
Layer 1 holds symbols and numbers. Activated by holding a thumb key, it gives access to all numbers, programming symbols ({}, [], =>, &&), and special characters. Essential for coding.
Layer 2 is navigation and media: arrow keys, volume, brightness, media controls. No more lifting your hand to find a key lost in the top-right corner of the keyboard.
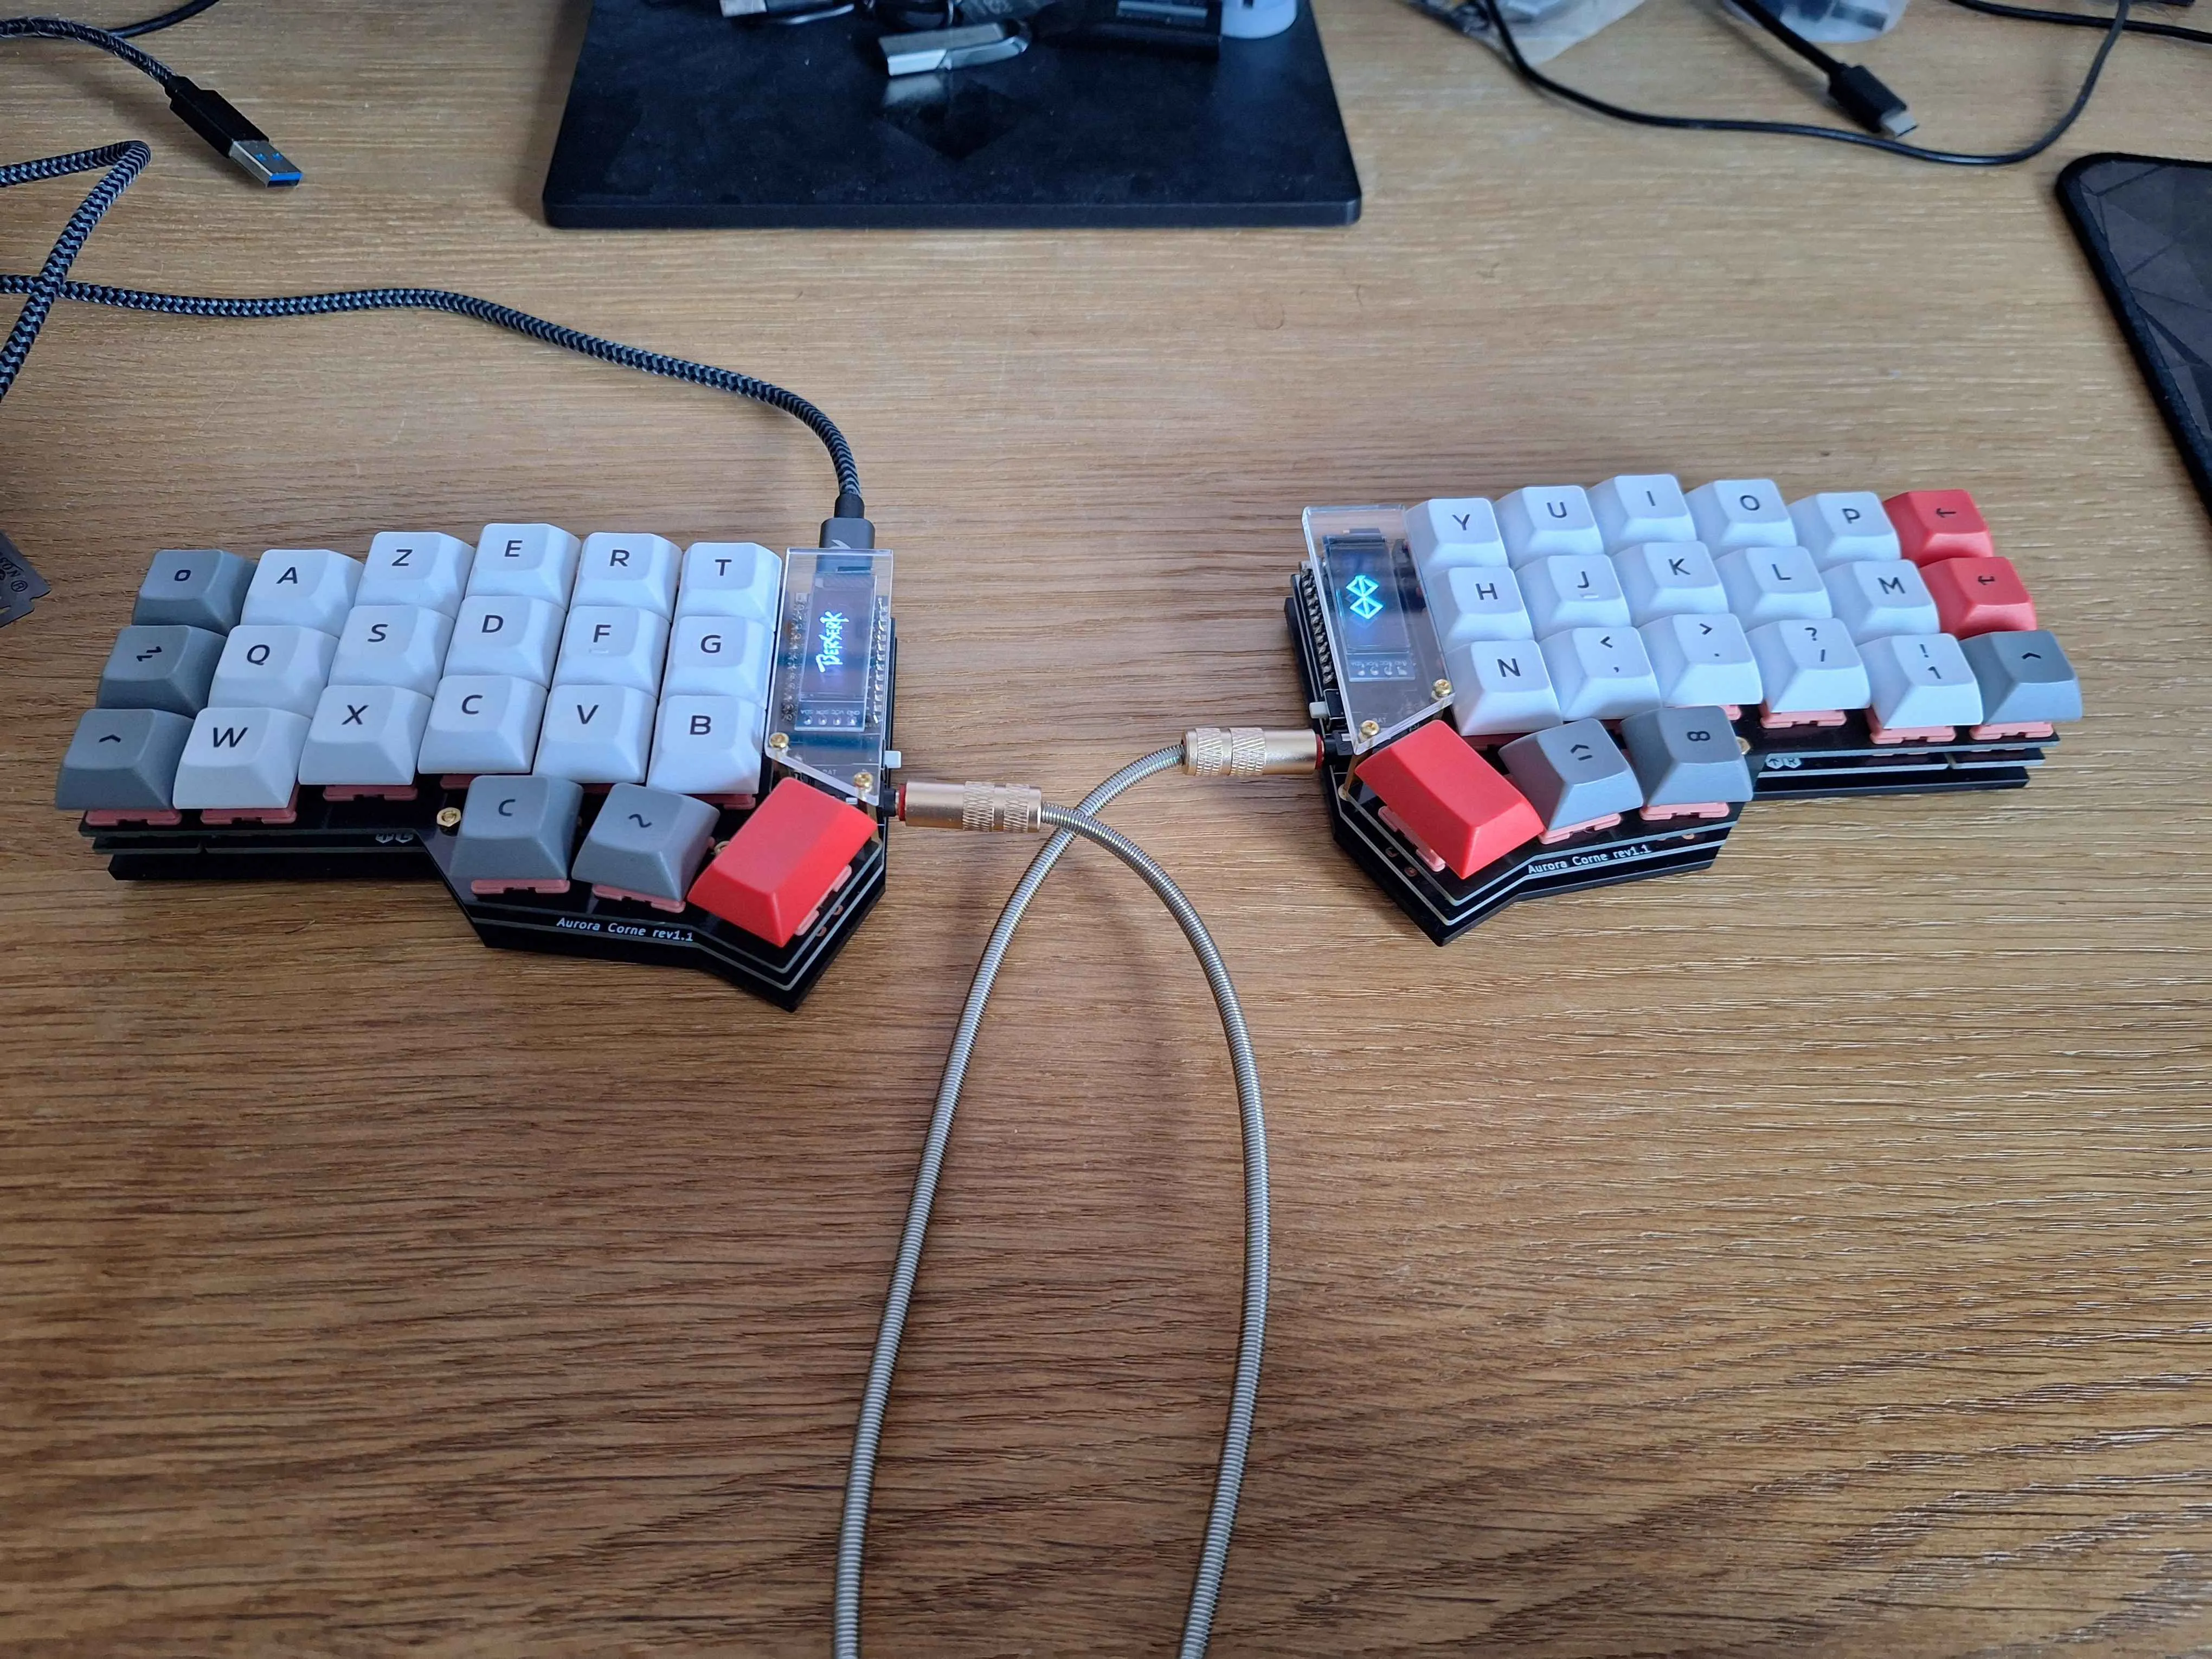
Final result and takeaways
After a weekend of soldering and a few evenings of QMK configuration, the keyboard is fully functional. There’s something deeply satisfying about typing on a tool you built yourself, key by key.
The learning curve is real. The first few days, you fumble for your bearings, activate the wrong layer, type symbols instead of letters. After a week, muscle memory takes over. After a month, going back to a standard keyboard feels strange, too many useless keys and hands too close together.
Beyond the keyboard itself, this project taught me a lot. I got into PCB design by studying the Aurora Corne schematics to understand key matrix routing and the role of anti-ghosting diodes. I did embedded C programming, code that runs directly on a microcontroller with no OS. And I also explored LCD screen programming and animations for the small OLED displays built into the keyboard, which took me into a domain I’d never touched before. What was supposed to be a keyboard project ended up becoming a gateway into embedded systems.